Category Archives: Year 2 Semester A

Week 5 – 2D VFX

During the space of this workshop I looked at how 2D Visual Effects can be incorporated into moving images.

I was showed examples of scenes of films/ TV shows with before VFX and after VFX, And how they can be used to enhance and improve a films aesthetic and logistics.

https://www.youtube.com/watch?v=2lLAc03DaeI

After that I was tasked with applying a image to a video using marker points.

[INSERT FINAL BOX RENDER]

I found out that if a video has a low frame rate it makes it a lot harder for the marker points to track the footage as motion blur occurs much easier compared to a higher frame rate.

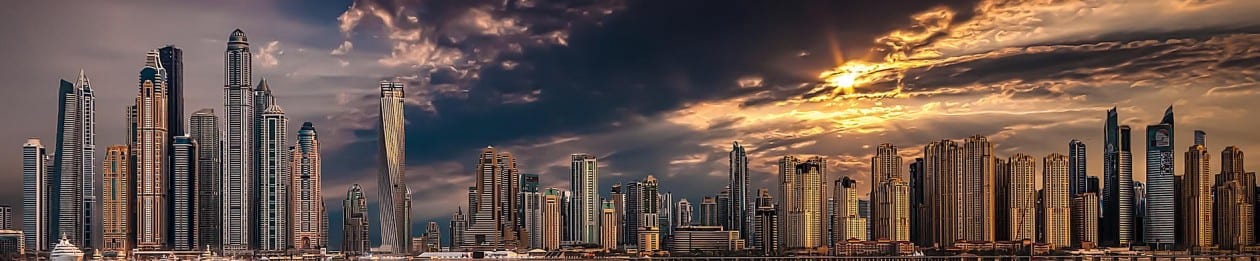
Once this was done the next task to perform a sky replacement from  a piece of footage using a image of another sky.

[INSERT RENDERED VIDEO OF SKYSCAPE]

2D motion capture does have its limitation however because if any of the selected pixels the marker pins are tracking disappear off frame or become obstructed the tracking will be lost.

Week 4 – Augmented Reality

To Test the information i had learnt in the workshop i downloaded the free app called augment on to my phone which allows me to created augmented reality live from my phone the images below are photos from a test i did at my desk in my room.

Screen Shot 2015-10-24 at 21.43.42 Screen Shot 2015-10-24 at 21.43.29Screen Shot 2015-10-24 at 21.43.06 Screen Shot 2015-10-24 at 21.43.19

 Here are some of the images i took off my phone when i was playing around with augment. From the images you can see that i successfully managed to create a tracking point to anchor the assets down and then was able to move around it in 3D space.

I really enjoyed this workshop as it allowed to experiment on the move with the app on my phone. It opened up a whole new area of creativity for me.

Week 3 – Projection Mapping

During the space of this workshop we were taught about what projection mapping was. I was showed some examples of early projection mapping and then different consumer software I can use to create my own work.

An example of Early projection mapping was Disney Lands Haunted Mansion from 1969 which featured what looked like floating ghosts but was actually clever uses of projectors and projection mapping.

I was then showed an app which can be downloaded on to an Mobile device called DynaMapper. I was showed a demonstration using this app which seemed easy and straight forward to use and then once connected up to a projector created effective results using the space and lines of the area being projected onto.

The next piece of software we were showed was for laptops and computers. The Software is called Heavy M. It felt a little more advanced than DynaMapper, but still managed to deliver similar effects. I downloaded Heavy M myself so I could play around with it.

During my workshop my tutor held a demonstration involving a small mock city as seen in the images below. The demonstration was creating shapes of the individual building and then filling it with either colour of moving image to create the effect of projection mapping.

IMG_20151008_115856559 IMG_20151008_115849492IMG_20151008_120004315

I found this workshop to be really interesting as i have never been introduced to projection mapping. I have seen it used many times as places such as theatres, museums and at live music concerts but never really understood at how it was carried out.

Week 2 – Developing a Brief & Digitising Logos

 The work we were set to carry out during the week was we were tasked in groups to interpret a brief we had been provided with and design logos influenced by style we like that would fit the brief ready for the workshop when we then created them using Adobe Illustrator.

My interpretation of the brief is as follows:

“We have been tasked with creating a industry standard logo that needs to be professional and versatile whilst still being fun and appealing for a domestic animal behaviour centre. After reading through the brief i have discovered that the centre have 4 pillars that they would like to pride themselves on and these are: Respect, Understanding, Education and Positivity. The brief also covers descriptions of what the organisation provides, this is so that the designer can get a background idea of what is expected by the client”

Before i started designing any logos i carried out some research into different designs that i liked:

Screen Shot 2015-10-20 at 18.16.11 Screen Shot 2015-10-20 at 18.15.55

The selection of images above where a source of inspiration for me. The first images which are made up of colourful segments of geometric circles was a innovative idea as it whilst still being simple has a very strong effect as it is clearly achieves its purpose to create a variety of different animals. The bright colours are good as well as it stands out without being too bright and garish. The second image appealed to me as whilst having a basic colour pallet of black and white which are two complementary colours the cat the incorporated into the outline of the dog work as it is catering to a large audience basis.

 Before the workshop I designed this idea (image below) as the paw print represents the animal side of the clients brief and the detail inside the paw is meant to represent the world. The very simple colour of green and blue makes it fun and appealing to look at whilst still being professional as the client wanted. In a final draft of this i would use a actual image of the globe to make sure that the island land masses are geographically correct in addition to this i would also make it more rounded.

12067274_10200884067782093_317069659_n

I then went on to create the logo digitally on Adobe Illustrator using the pen tool. It took me a while to get used to using Adobe Illustrator . I was very happy with the finished results.

[INSERT FINISHED LOGO HERE]

Week 1 – Evolution of Logos


starbucks_logo_cvcHistory2


The Logo of Starbucks has evolved throughout time due to it needing to become more modern and keeping up with current design movements and cultural themes. As time progressed from 1971 to 1987 the detailed hand drawn image that showed female nudity was removed most likely due to new regulations for branding.  Further more from 1987 the iconic colour green was introduced to bring in a bit of variety to the black and white logo. Between 1992 and 2011 the logo became more simplistic and stylised as i mentioned earlier to keep up with modern times.